Traktor Pro: Getting Started with Remix Decks & Stems
Prerequisites
- Computer: A Windows or Mac machine that meets the Traktor Pro System Requirements
- Traktor Pro Software: Either the demo version or a purchased license from Native Instruments
- Audio Files: At least two MP3 or WAV tracks to mix together
- Optional: DJ controller (e.g., Traktor Kontrol S2, S4), headphones, speakers
Step 1: Downloading and Installing Traktor Pro
-
Access the Installer:
- Navigate to the Traktor Pro page on Native Instruments.
- Create or log in to your Native Instruments account.
- Purchase Traktor Pro, or download the free demo if you’re just trying it out.
Why? Registering ensures you receive updates and access to customer support.
-
Download the Native Access App:
- Native Instruments uses Native Access to manage installations.
- Download Native Access for Mac or Windows and install it.
-
Install Traktor Pro via Native Access:
- Open Native Access and sign in.
- If you purchased Traktor Pro, use the serial key to register your product (Account > Add serial).
- Find Traktor Pro in the list of available products and click Install.
Why? Installing through Native Access ensures your software is always up to date and properly registered.
-
Launch Traktor Pro:
- Once installation is complete, find Traktor Pro in your Applications (Mac) or Start Menu (Windows).
- Launch the application.
Pro Tip: Consider creating a desktop shortcut for easier access.
Step 2: Configuring Audio and Preferences
-
Select Your Audio Device:
- Go to Preferences: open the gear icon in the top right, or use Ctrl+, (Windows) / Cmd+, (Mac).
- Navigate to Audio Setup.
- Select your audio interface or soundcard from the Audio Device dropdown.
Why? Correct audio device selection ensures sound outputs as intended, through speakers, controllers, or headphones.
-
Adjust Output Routing:
- In Preferences, select Output Routing.
- Set Mixing Mode to Internal unless you have an external mixer.
- Assign Output Master to the channels that go to your venue speakers or monitors.
- (Optional) Assign Output Monitor for headphones/cue output, if using a DJ controller or audio interface.
Pro Tip: If you have only a standard headphone jack, you may need to use split-cable or direct monitoring in your sound settings.
-
Set Up Your Controller (Optional):
- Connect your DJ controller before opening Traktor Pro for the best plug-and-play compatibility.
- Most certified controllers will auto-map. To manually map, go to Preferences > Controller Manager, and select your device from the Device list.
-
Scan Your Music Library:
- The Browser section on the left side contains a Music Folders node.
- Add your music folders by right-clicking in Explorer > Music Folders and selecting Add to Collection.
Pro Tip: Organize your tracks into folders by genre, mood, or event for easier navigation!
-
Import Tracks:
- Drag and drop tracks from your Explorer or Desktop directly into the Track Collection.
- Wait for Traktor to analyze the BPM and waveform.
Step 3: Exploring the Interface
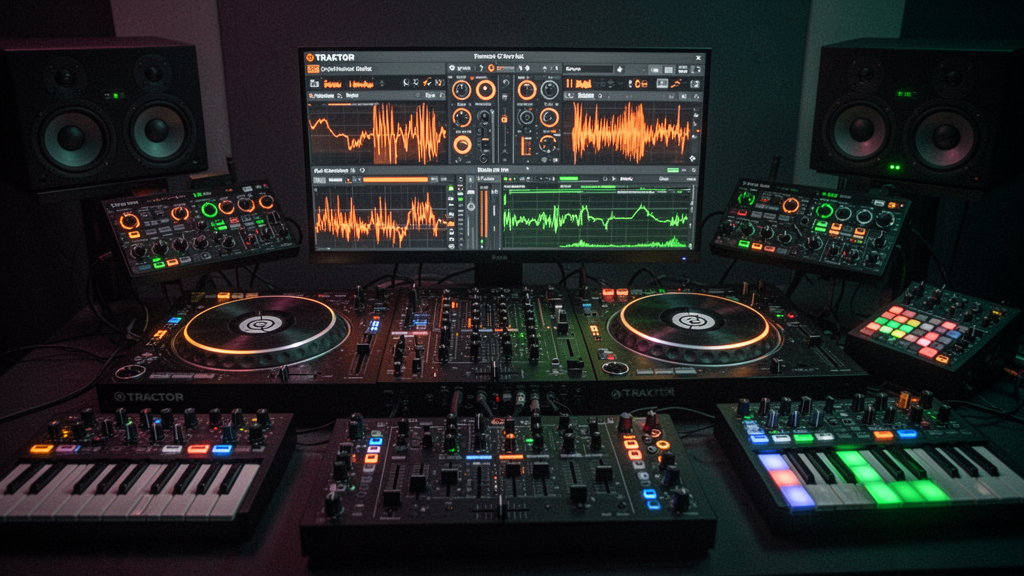
Take a few minutes to familiarize yourself with Traktor Pro’s four main interface sections:
- Decks (A, B, C, D) – The virtual turntables or CDJs; typically you’ll start with Deck A and B (top left and right).
- Mixer – Central section with channel volume faders, crossfader, EQ (low/mid/high), and filter knobs.
- Browser – Bottom of the screen; browse, search, and load tracks from your library.
- FX Panels – Top section, where effects are loaded and controlled.
Pro Tip: Use Ctrl+1/2 (Windows) or Cmd+1/2 (Mac) to quickly toggle between browser and mixer views.
Key Buttons and Controls
- Load: Click the arrow icon on Deck A or B to load a selected track.
- Play/Pause: Triangle button under the deck waveform.
- Cue: Sets or returns to a "hot cue" or starting point.
- Sync: Auto-matches the BPM of decks.
- Pitch Fader: Adjusts tempo manually (shown beside each waveform).
Step 4: Loading and Preparing Tracks
-
Load Tracks to Decks:
- In the Browser, find a track.
- Select the track, then drag and drop it over Deck A.
- Repeat with a different track for Deck B.
- Alternatively, use the arrow Load icons next to each deck or press Enter for Deck A, Shift+Enter for Deck B.
Why? Properly loaded, analyzed tracks will display waveforms and BPM for beatmatching.
-
Analyze Tracks (optional):
- If the grid or BPM seems off, right-click the track and choose Analyze (Async).
- This ensures Traktor's beatgrid, cue points, and BPM detection are accurate.
Why? Analysis is crucial for Sync and loop features to work as intended.
-
Set Cue Points:
- While the track is stopped at your desired start point, click the Cue button (flag icon or keyboard C).
- This lets you instantly jump to the perfect place to mix in the track.
-
Check the Beatgrid:
- Ensure the grid lines up with each beat of the song. Correct with the Grid panel above the waveform if necessary.
- Use mouse or the +/- buttons to nudge the grid.
Step 5: Basic Mixing – Your First Transition
-
Start Playback:
- Press Play on Deck A (mouse or spacebar for last focused deck).
- Listen to the track and watch the waveform.
-
Sync BPM:
- Press Sync on Deck B. This will change Deck B’s BPM to match Deck A.
- Match beats visually using the waveforms and by ear, with headphones.
- Alternatively, use the pitch fader for manual beatmatching (slide next to waveform).
Pro Tip: Even with Sync on, check beat alignment by ear for a professional-sounding transition.
-
Cue Up Deck B:
- With Deck A playing live, press Play on Deck B, but have its volume down, and cue output sent to your headphones (use Monitor cue button in Mixer).
- Adjust its position with the jog wheel, nudge buttons, or waveform scrubbing so both tracks are aligned on the downbeat.
- Start Deck B at the right musical phrase (e.g., beginning of a breakdown or chorus).
-
Use EQ to Blend:
- As Deck B enters, slowly raise its channel volume while lowering Deck A’s.
- Use the EQ knobs to cut or reduce bass on the incoming track to avoid clashing low frequencies.
- As the transition completes, restore EQ as desired.
Pro Tip: Classic mixing technique: "Cut the bass on incoming track, swap during the drop!"
-
Crossfade (Optional):
- Use the Crossfader (center of Mixer) to smoothly move from Deck A to B for quick transitions, especially in hip hop or pop mixes.
- Gradually move the fader to the right (Deck B) as you bring in the new track.
Troubleshooting & Common Mistakes
- No Sound Output: Double-check that the correct audio device is selected in Preferences > Audio Setup and outputs assigned in Output Routing.
- Unable to Load Tracks: Ensure tracks are supported audio formats (MP3, WAV) and not DRM-protected.
- Sync Not Working: Try re-analyzing tracks or manually correcting the beatgrid.
- Pops/Crackles: Increase the audio buffer size in Preferences > Audio Setup (higher latency for stability).
- Controller Not Detected: Restart Traktor with controller plugged in, check drivers, and review Controller Manager mappings.
Warning: Always test your setup at home before performing live. Unexpected audio routing or hardware issues can derail a DJ set.
What’s Next?
- Dive Deeper into Effects: Explore Traktor’s FX Units (Delay, Reverb, Beatmasher, etc.) for creative transitions. Assign them via the upper FX panels and control routing per deck.
- Hotcues & Loops: Practice with multiple cue points and setting/triggering loops to remix tracks live.
- Advanced Library Management: Rate, color-code, and create playlists in your Track Collection for smoother set construction.
- Explore STEMS/Remix Decks: Traktor Pro supports live remixing of track elements (stems), opening up even more creative possibilities.
- Performance Recording: Use Recording tab in Preferences to capture and review your sets.
Pro Tip: The best DJs learn by listening critically to their mixes. Record, replay, and refine!