Advanced Traktor Pro: MIDI Mapping & Custom Controllers
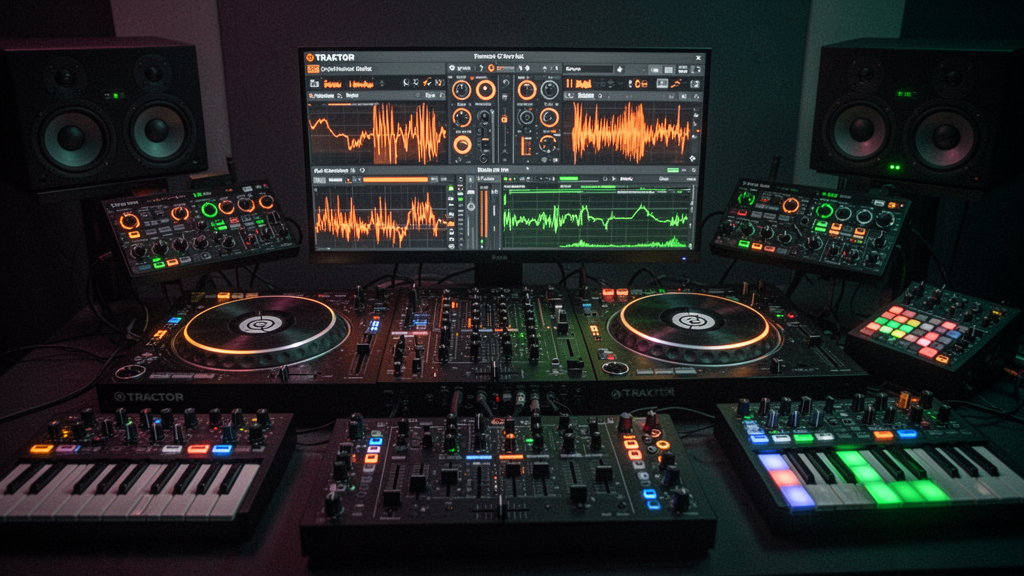
Prerequisites: Prepare for Advanced Traktor Pro Mastery
- A licensed install of Traktor Pro 3 (latest version recommended)
- A compatible DVS (Digital Vinyl System)-ready soundcard/interface (e.g., Traktor Audio 6, 10, S4)
- DJ controller or MIDI device (for advanced mapping)
- 2 or more turntables or CDJs (for DVS use)
- High-performance laptop/desktop meeting NI's system requirements
- Headphones and speakers/PA for monitoring
- Intermediate knowledge of Traktor Pro basics (deck loading, EQ use, cue points)
Pro Tip: Always back up your Traktor settings (Track Collection & Config Files) before experimenting with advanced features.
Step-by-Step: Advanced Power User Techniques in Traktor Pro
-
Optimize Traktor for Low-Latency, High-Performance Mixing
What: Fine-tune Traktor's preferences to guarantee reliability and minimal audio dropout during demanding sets.
-
Open Preferences → Audio Setup
- Set sample rate to
44100 Hzor48000 Hz(higher values can raise CPU load without significant quality gains). - Adjust latency (ASIO Buffer) as low as your system comfortably allows (e.g., 256 samples). If you encounter audio glitches, increase latency slightly until stable.
- Set sample rate to
-
Navigate to Preferences → Processor (if available)
- Enable Multi-core Processor Support for smoother performance if your CPU supports it.
-
Turn Off Unused Features
- In Preferences → Mixer → Effects, disable FX slots you don’t use to conserve resources.
Why: Audio dropouts or latency issues can ruin a performance. Optimizing these settings provides a robust foundation for advanced features like DVS and effects.
Troubleshooting: If the audio stutters, try disabling Wi-Fi/Bluetooth and closing background apps. Lower the sample rate or increase buffer size until stable sound is achieved.
-
Open Preferences → Audio Setup
-
Set Up DVS and Calibrate for Vinyl/CD Control
What: Configure Digital Vinyl System in Traktor for hands-on, tactile control over digital tracks with turntables or CDJs.
-
Connect Your Hardware
- Connect timecode vinyl/CD to your audio interface's phono inputs.
- Link your interface's outputs to your DJ mixer or monitoring system.
-
Configure DVS in Traktor
- Go to Preferences → Input Routing. Assign Input Channel A/B to your device's phono/line channels.
- Go to Preferences → Decks and set the desired decks to Scratch Control.
- Choose Timecode (not Live Input) for vinyl/CD control.
-
Calibrate Timecode Signal
- Click Settings → Audio Setup → Timecode Setup. Start your turntables/CDJs and press Calibrate in the Scope section of the Traktor deck.
- Confirm that the signal circle appears as a stable, centered ellipse. Adjust input gain on your interface if needed.
Why: Accurate DVS setup enables you to mix, scratch, and manipulate digital files just like real vinyl, combining classic DJ feel with Traktor's digital power.
Common Mistake: If playback drifts, check for dirty/scratched timecode vinyl, or incorrect input mapping. Use only Traktor-certified interfaces for seamless DVS support.
-
Connect Your Hardware
-
Advanced Controller and MIDI Mapping
What: Customize hardware mappings to control Traktor’s advanced features, unleashing workflow efficiencies or creative tricks.
-
Open Controller Manager
- Navigate to Preferences → Controller Manager.
-
Import/Export Mappings
- Click Add… to create a new mapping for your device, or Import to use a community-made TSI file.
-
Create Custom Mappings
- Click Add In… or Add Out… to assign software functions (like Hotcue, Loop Size, FX On) to controller buttons or faders.
- Use Learn button to physically tap/turn the controller element and instantly link it to the function.
- Set type of control (e.g., Toggle, Hold, Relative), assignment (Deck A, B, Master), and choose feedback (e.g., LED color) for visual cues.
-
Layer Controls for Performance
- Assign Shift-modified layers to pads/faders, enabling more functionality from a limited controller grid.
Why: Tailored mappings increase your speed, creativity, and performance confidence by placing power features under your precise control.
Pro Tip: Check out DJ TechTools for quality custom mappings. Always keep a backup of your TSI configs!
-
Open Controller Manager
-
Master Advanced Remix Decks & Stems Workflow
What: Use Traktor's Remix Decks and Stems to deconstruct tracks or layer live loops for next-level creative performance.
-
Switch Deck View
- In the Deck header, select Remix or Stem from the deck type dropdown for Deck C/D.
-
Load Remix Sets or Stem Files
- Drag-and-drop a .trak remix set, .stem.mp4 or loop/sample file onto the deck.
-
Trigger Samples & Loops
- Use the Remix Deck grid, controller pads, or keyboard shortcuts
Z, X, C, V...(default for Deck C) to trigger slots. - Use volume and filter knobs below each column for per-sample mixing.
- Use the Remix Deck grid, controller pads, or keyboard shortcuts
-
Manipulate Stems
- Use the colored faders to individually control Drums, Bass, Synths, Vocals in Stem files, isolating or layering elements on the fly.
Why: Remix and Stem Decks unlock live mashups, acapella layering, instant drum mixing, and true on-the-fly remix possibilities — delivering unique sets every time.
Creative Tip: Combine hotcues and effects on stem elements for never-heard-before breakdowns and drops!
-
Switch Deck View
-
Design Advanced FX Chains and Routing Tricks
What: Go deep with Traktor’s flexible effects, chaining effects or routing them for standout transitions and build-ups.
-
Set FX Units to Group or Single
- In Preferences → FX → FX Panel Mode, choose Group (3 micro FX per unit) or Single (full control over a single effect at a time).
-
Create FX Chains
- Stack compatible effects (e.g., Delay, Reverb, Gater) in Group mode and assign them to a deck using the FX Assign buttons.
- Tweak effect parameters for creative blends (e.g., long delay tails into big reverb washes for breakdowns).
-
Experiment with Advanced Routing
- Send two decks through the same FX unit for layered transitions, or assign FX1 to Deck A and FX2 to Deck C for hybrid tricks.
Why: Custom FX chains and smart routing transform standard transitions into signature moments and add personal flair to every set.
Experiment! Use Macro FX (like Wormhole or Event Horizon) for instant wild, evolving transitions.
-
Set FX Units to Group or Single
-
Unlock Creative Layering and Harmonic Mixing
What: Use key lock, key shift, and phrasing techniques to build lush, harmonic mixes from advanced workflows.
-
Analyze and Display Key
- Right-click your song(s) in the browser and select Analyze (Async) with Key checked.
- Enable key column by right-clicking the browser header; use the Camalot notation for easy mix-in-key reference.
-
Activate Keylock and Key Shift
- Check the Keylock (padlock icon) below pitch fader to lock current key for a deck.
- Use the key knob or +/- buttons to semitone-shift tracks for harmonic blends.
-
Layer Loops and Vocals with Harmonic Precision
- Drag a vocal sample/Acapella onto a Remix Deck, match Camelot keys, and mix with rhythm deck for live mashups or breakdowns.
Why: Keeping mixes harmonically compatible produces smoother blends, richer layering, and transitions that always sound musical, not clashing.
Pro Tip: Download and print a Camelot wheel as a quick reference for compatible key mixing!
-
Analyze and Display Key
-
Customize Workflow with Advanced Layouts and Browser Functions
What: Adapt the UI to compliment advanced performance and rapid track access.
-
Create Custom Layouts
- Go to Preferences → Layout Manager and enable Enable Layout Selector.
- Create and name specific layouts for Preparation, Performance, DVS, 4 Deck, etc.
- Use keyboard shortcut
Ctrl + 1/2/3...(Win),Cmd + 1/2/3...(Mac) to switch layouts instantly.
-
Supercharge Your Collection Browsing
- Tag your files by genre, energy, and mood from the browser’s Preparation List for instant organization.
- Use search filters (
Spaceto focus search bar) and smart playlists for fast set building. - Right-click tracks to Analyze or batch-analyze folders for Rekordbox-style management.
Why: Fast navigation and a custom interface ensures you spend less time menu diving and more time performing creatively during your sets.
Pro Tip: Assign favorite playlists to Favorites Bars for quick drag-and-drop access during peak performance moments!
-
Create Custom Layouts
-
Automate Advanced Tasks: Hotcues, Beatgrids, and Auto-Loops
What: Prepare tracks for truly plug-and-play creative mixing by perfecting beatgrids, hotcues, and auto-loops.
-
Refine Beatgrids
- Load a track and press Grid (or click the
Gridtab above waveform). - Set the first beat marker with Grid and adjust BPM on-the-fly if needed for perfect sync.
- Load a track and press Grid (or click the
-
Place Hotcues for Key Mixing Points
- Press
1-8on your controller or deck interface at key points: intro, breakdown, drop, outro. - Color-code your hotcues (right-click hotcue button) for faster recognition.
- Press
-
Set Auto-Loops for Live Remixing
- Use Auto Loop button or touch strip to instantly grab 2, 4, 8, or 16-beat loops during performance for instant build-ups or breakdowns.
Why: Meticulously prepped tracks allow you to focus on crowd energy and spontaneous creativity instead of technical hurdles during your set.
Pro Tip: For rapid recall, name and color hotcues based on function (e.g., Green = Drop, Red = Outro, Blue = Breakdown).
-
Refine Beatgrids
Troubleshooting & Common Advanced Pitfalls
- Audio Dropouts: Check power settings (set to High Performance), disable visual FX in OS, use wired mouse/keyboard to avoid Bluetooth latency spikes.
- DVS Calibration Drifts or No Signal: Confirm RCA cables are high quality, timecode vinyl is clean, all gain settings are correctly matched (not maxed out causing clipping).
- Custom Mappings Not Triggering: Ensure Controller Manager has correct device selected in Device dropdown, and check for mapping conflicts (duplicate functions per button).
- Effects Not Routing Properly: Double-check deck-to-FX assignments and that FX unit(s) are enabled in both software and controller layout.
Warning: Massive mapping changes or controller updates can sometimes corrupt settings. Always make a backup before big changes!
What's Next: Keep Pushing Your Traktor Pro Skills
- Explore Step Sequencer for live drum and synth programming in Remix Decks.
- Install Komplete and integrate Maschine for hybrid live/DJ sets.
- Dive into Advanced HID Integration with CDJs or touchscreen devices.
- Create signature effect macros and remix sets to develop your own unique DJ sound.
- Join online forums and local DJ meetups to share new mapping and performance ideas.
With these advanced approaches, you’re ready to break creative boundaries and deliver innovative, crowd-moving DJ sets with Traktor Pro!